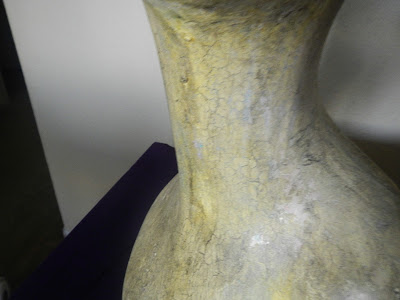
It's Halloween time. Sure, nice new displays are bright and shiny, but really what makes people nervous is moth-eaten, tattered, oxidized, tarnished, dirty, stained with some anonymous substances, rusted, mildewed, moldy, peeling, faded, and crackled.
Here's some inspiring photographs to show you how things age -
(above -this abandoned site shows lots of things including mildew, torn wallpaper and aging.)
(above-from an abandoned hotel. Paint a surface black. Spread a good coating on the dry paint of Elmer's glue. Let dry. Paint a pale icy mint in some areas and cream in a few small patches. Now, use dryer to heat and dry and crack it)
(above - rusted hinge in a burned out home. Consider mixing paper maiche pulp with elmer's and black paint to cover the surfaces for a burned out building. Do not paint atop of the pulp/glue mix, instead add the paint to it so it becomes part of the texture. See rusting instructions below)
RUST
Crackling
You can do simple crackling with Elmer's glue - super cheap - (Elmer's also works great for fake skin you can peel when it dries for Halloween makeup)
Aging/Antiquing
How about aging things? The most simple way is with a good antiquing lacquer in a brownish color.
The mannequin head (above) that I prepared was a plain new mannequin head originally (for sale in my Etsy shop HERE - she comes with an urban legend).
I aged her with painting her patchwork baby blue and pink randomly, then crackling her and adding a skin tone. I took a black aging glaze on her and immediately wiping off with a cloth so the black soaked into some paint here and there and into all the cracks. I painted on her makeup and then sanded it. I also took rust paint in water and dripped it around to make some water stain streaks.
Patina
Faux patina like the greening you find on copper is another interesting process with may ways to do it. If the item isn't copper, I utilize sponging with paints. Here's some tips -
Some items you might want to have on hand if you plan to do some set building for Halloween (or even shabby chic'ing your home items).
Elmer's glue
crafting acrylic paints
black aging glaze
antiquing glaze in a brown tone
salt
hydrogen peroxide
natural sponges
brushes
sandpaper
matte or semigloss varnish
Don't underestimate Elmer's glue - it's freaking amazing. I made this Scarecrow head utilizing it mixed with water (2 parts glue/1 part water). It works as a natural fabric stiffener. Works great-firm and great!
("Crow Eater" for sale in my Madam Curio Etsy shop HERE)
The process of making sets can be just stunning. Look at some good movies that show amazing sets that have been aged - "The Changeling," and "Dead Silence" come to mind. Peeling wallpaper is a must! It's not a hard task to make wallpaper peel, but be sure to first wallpaper the item, let fully dry. Then, start sponging it with water and rust paint mixed, mildewing it with black paint on a natural sponge, dabbed off before lightly speckling the surface by pressing it. Heat it with a hair dryer. Begin to peel it back. It's even better if you put down a wallpaper and then another atop of it - to peel and expose -
Happy set design!


Comments
Post a Comment